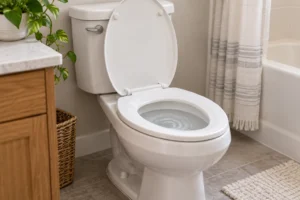
Separate three symptoms before adjusting the toilet: the handle or button releases little water, the tank refills too slowly for the next use, or the bowl rises and drains poorly after water is released. They point toward different parts of the system. Repeated extra flushing can turn a drainage problem into an overflow.
Stop if the bowl rises or other fixtures back up
Do not flush again when the bowl is high or rising. Stop using affected fixtures if sewage appears elsewhere, and arrange plumbing help. Keep children and pets away from wastewater. If a chemical cleaner was added, do not plunge, dismantle or add another product; tell the plumber exactly what was used.
For a single suspected bowl blockage, follow the clogged-toilet guide. If the bowl drains poorly despite normal water release, increasing tank water or holding the button longer is not a substitute for assessing the drain.
Identify the toilet and the change in behavior
Find the model and whether it is a gravity tank, dual-flush cistern, pressure-assisted system or electronic toilet. Note whether performance declined gradually, began after maintenance, or was poor from installation. For dual-flush models, confirm which normal button or handle action selects the intended flush.
These initial tank checks concern an accessible conventional gravity tank only. Do not open a sealed pressure vessel, concealed cistern or electrical housing using another model’s instructions. A safely removable ceramic lid should rest on a protected stable surface.
Separate filling, release and drainage
For a conventional gravity toilet, follow the water in three stages: the tank fills, the flush mechanism releases stored water, and the bowl discharges through the trapway into the drain. A weakness in one stage cannot be corrected reliably by changing a different stage.
| Observed stage | Useful next check | Avoid this mistaken fix |
|---|---|---|
| The tank has not finished refilling before the next use. | Distinguish refill time from the final settled level; compare with the model’s marked waterline. | Raising the setting without establishing whether refill is incomplete. |
| The tank is filled, but normal control movement releases little water. | Model and fitted part compatibility; visible linkage behaviour allowed by its manual. | Random chain, button-rod or flapper adjustments borrowed from a different model. |
| Water is released, but the bowl rises and falls slowly. | Stop further flushing and use the active blockage guide. | Adding tank water or repeated flushes to force drainage. |
| The tank restarts between uses. | Use the running-toilet guide to identify a leakage path. | Assuming the sound alone proves a failed fill valve. |
Korky’s linked guidance distinguishes fill level, refill-tube arrangement, flapper fit and control linkage. These are different functions, even when the complaint is simply “weak flushing.” Use the exact model’s settings and approved cleaning instructions.
Compare the first and second flush without creating a test blockage
Use the history of ordinary use: was the second flush weak because the tank had not refilled, or did a fully replenished tank still produce the same poor bowl drainage? The first observation directs attention to replenishment; the second keeps release and drainage questions open. Do not perform repeated flushes when the bowl is draining abnormally.
This article addresses weak flush performance. A current obstruction belongs in the active blockage guide; repeated episodes after clearing belong in the recurring-clog guide. Those separate questions should not be treated as the same repair.
If the control moves but releases little water
Record whether a handle feels loose, a button sticks, or the flush mechanism appears not to complete its normal movement. A linkage, replacement-part setting or incompatible component can produce a weak flush. Do not bend rods or select a chain length from a general article.
Korky’s gravity-toilet guide distinguishes linkage, part fit, refill-tube arrangement and tank fill level. Use the exact toilet and fitted component instructions for any permitted adjustment. Photograph part numbers and preserve the old repair record if the symptom followed replacement.
If the first flush is better than the next one
Observe whether the tank has finished refilling before the next use. Compare its settled level with the model’s marked waterline. A slow refill and a fill level set too low are different conditions; record which occurs instead of raising every toilet’s float.
Check only the accessible supply arrangement described by the manual. Do not force an old shutoff or disconnect a live supply to test flow. A plumber may need to distinguish restricted supply from a fill-valve problem. If the tank refills between uses, use the running-toilet guide to investigate leakage as well.
If water releases normally but bowl washing has changed
Report the pattern of water entering the bowl, visible deposits and any changes in the bowl’s normal refill level. Cleaning and repair depend on the toilet’s rim, jet and flushing design. A rimless model should not receive instructions written for rim holes it does not have.
Use only the manufacturer-approved cleaning method for accessible surfaces. Do not drill jets, scratch glazed surfaces or pour acids or boiling water into the toilet. If normal approved maintenance does not restore performance, have the model’s flushing and drainage paths assessed.
If it has always flushed poorly or repeatedly clogs
Give the installer the model, installation date and whether adjacent fixtures also drain poorly or gurgle. Drain, vent, connection and installation issues cannot be established by changing tank parts at random. The recurring-clog guide explains what history helps avoid repeated short-term clearing.
Ask the plumber to identify whether the weak performance comes from water delivery into the bowl or drainage out of it, and what observations support the proposed repair. Do not access roof vents yourself or add extra water to force a flush.
Check the corrected settings and ordinary performance
After safe repair, verify the specified fill level, normal control return, complete refill and performance during ordinary use. Inspect for new external leakage. Do not deliberately overload the bowl as a test.
Keep the component and work details. If weak flushing returns, report whether the tank, control or bowl behavior changed. That distinction is more useful than replacing the same part again without confirming why it failed.