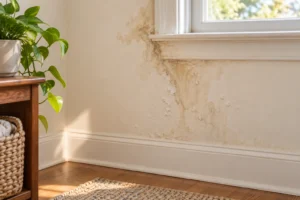
A useful cleaning tip starts with the material, not the mixture. A method that lifts a mark from a ceramic mug may damage a coated appliance, painted wall or sofa. These 12 tips explain what to use, how to work gently and where each method stops being appropriate.
Start with the care label or product manual, use the least aggressive permitted method and test an inconspicuous area first. If colour transfers, the finish changes or the surface becomes sticky, stop. A quick before-and-after demonstration cannot establish that a method suits your belongings.
Choose the surface before the cleaner
| What needs attention? | Start here | Avoid assuming |
|---|---|---|
| A stain on washable clothing | Fabric label, stain type and a suitable laundry pretreatment | Dish soap belongs in the washing-machine dispenser |
| An appliance exterior | Exact finish and the manufacturer’s cleaning instructions | Every silver-looking panel is bare stainless steel |
| A sofa or carpet | Upholstery code or carpet-care instructions | A homemade wet mixture is suitable for every fibre |
| A wall, mirror or shower door | Paint cure, coating and material-specific care | More scrubbing or a stronger cleaner will help |
These are routine cleaning methods, not disinfection procedures. Where sanitizing or disinfection is needed, follow appropriate public-health guidance and the product label, including surface suitability and contact time. Never mix household bleach or disinfectants with other cleaning products. Keep products labelled and away from children and pets. See the CDC’s distinction between cleaning, sanitizing and disinfecting.
1. Lift coffee stains from a compatible mug
Use: baking soda, water and a soft cloth, if the mug’s care instructions permit mild abrasive cleaning. Start by washing the mug normally. For remaining coffee staining, use a little baking soda with water and wipe gently with a damp cloth. Rinse thoroughly and wash before drinking from it again. Use a comfortable water temperature; avoid sudden temperature changes and handling very hot water.
Where it fits: a sound, washable mug with a finish that tolerates this method. Skip delicate decoration, metallic trim, speciality coatings and cracked or chipped drinkware. Stop if the glaze looks scratched or dull. The aim is to lift a surface stain, not scrub away the finish.
Reference: ARM & HAMMER’s coffee-mug cleaning method. The baking-soda manufacturer describes a mug application; that does not make baking soda suitable for every kitchen surface.
2. Pretreat cooking-oil marks before washing
Use: a laundry detergent labelled for pretreatment and suitable for the fabric. Blot excess oil without spreading it, then apply the detergent as its label directs. Leave it only for the stated time and wash at a temperature permitted by the garment label. Check the stain before drying; if it remains, repeat an appropriate treatment rather than immediately tumble-drying it.
Where it fits: washable clothing, after checking colourfastness. Do not treat dry-clean-only garments, leather or uncertain delicate fabrics as ordinary cotton. Ask a suitable cleaner when the fabric or stain is uncertain. Use laundry products in the washer; a viral dish-soap pretreatment is not an instruction to fill its dispenser with dishwashing liquid.
Reference: Tide’s grease-stain guide, particularly its pretreatment, care-label and check-before-drying steps.
3. Give white socks and cloths a suitable wash
Use: the fabric label and a measured dose of appropriate laundry detergent. Separate whites from items that may release dye. Pretreat dirty areas with a compatible laundry product, avoid packing the drum tightly and choose a cycle and temperature allowed for those items. Inspect before drying. A second appropriate wash may be needed; extra detergent is not automatically a better wash.
Where it fits: washable white textiles. White colour alone does not establish that bleach, hot water or a long soak is safe: elastic, trims and fibre blends differ. Only use a whitener if both its instructions and the garment label permit it. Permanent discoloration is not proof that the fabric is still dirty.
Reference: Tide Cleaners’ guide to washing whites. Adapt the sorting and washing approach to the actual fabric rather than applying a universal whitening recipe.
4. Clean stainless steel with the grain
Use: a soft cloth and the cleaner permitted for your appliance’s exact finish. For traditional stainless steel where the manufacturer allows it, start with warm soapy water on a nonabrasive cloth. Wipe with the grain, remove the soap with a clean damp cloth and dry with a soft cloth. Keep moisture away from controls, openings and electrical connections.
Where it fits: the finish identified in the manual. Black stainless, fingerprint-resistant coatings, plastic trim and painted panels may require different care. Do not substitute toothpaste, steel wool or an abrasive powder for the specified cleaner. A product called stainless-steel polish may also be unsuitable for adjacent trim or a particular coating.
Reference: Whirlpool’s finish-specific stainless-steel instructions, which distinguish finish types and warn against abrasive products.
5. Work on oven-door glass only when it is cool
Use: soft cloths and the glass-cleaning product or method allowed in the oven manual. Switch the oven off and let it cool completely. Remove loose debris gently, apply the approved cleaner as directed, wipe away residue and dry. Keep liquid out of door vents, slots and the seal. Do not spray indiscriminately across the whole door.
Where it fits: accessible, intact door glass. This is not a door-removal or between-pane cleaning procedure. Leave trapped internal staining, cracked glass, damaged seals or uncertain disassembly to the manufacturer or service provider. Avoid metal scraping or a homemade abrasive mixture unless the exact product instructions permit the method.
Reference: Whirlpool’s oven-glass guide. Its first preparation step is cooling the oven; model instructions control which cleaning methods and access are appropriate.
6. Clean the toilet seat separately from the bowl
Use: the seat manufacturer’s permitted cleaner and a dedicated soft cloth. Many plastic seats allow mild detergent on a damp cloth. Clean accessible surfaces and hinges gently, remove remaining cleaner and dry. Use separate cloths for toilet areas and kitchen or general household surfaces, and wash your hands afterwards.
Where it fits: the seat and finish named in its instructions. Wooden, painted, heated and bidet seats can have different requirements; keep water away from electrical parts. Do not leave bowl cleaner on the seat or assume that shaving foam removes the cause of a urine smell. Persistent odor may require finding a missed spill or arranging assessment of a leaking fixture.
Reference: Kohler’s toilet and plastic-seat care instructions (PDF, page 6), which specify mild detergent for the plastic seat and prompt removal of cleaner residue. Use the current instructions for your own seat.
7. Dab marks on washable painted walls
Use: a soft sponge or cloth, water and, when permitted, mild soap. Dust first so loose grit is not rubbed into the paint. Test a small hidden area, wring the cloth until it is only damp and dab gently. Remove soap with a separate clean damp cloth and blot dry. Keep water away from outlets and switches.
Where it fits: sound paint that has cured and is washable. Follow the paint maker’s cure time, which is different from being dry to the touch. Flat finishes can mark or change sheen when scrubbed. Stop if colour lifts. Wallpaper, damaged paint and recurring damp or mold patches need a different approach; see the damp-wall guide for recurring moisture.
Reference: Benjamin Moore’s wall and cabinet cleaning guidance, including cure time, a gentle touch and removing soap residue.
8. Put mirror cleaner on the cloth
Use: a soft clean cloth and a mirror-compatible product, or a lightly damp cloth if that is what the manufacturer specifies. Apply the permitted cleaner to the cloth rather than directly onto the mirror. Wipe gently, keep the edges and backing dry and remove remaining moisture with a clean soft cloth.
Where it fits: ordinary accessible mirrors with identified care requirements. Coatings, anti-fog systems, frames and mirrored cabinets can have specific restrictions. Do not assume that vinegar, ammonia or shaving cream is suitable for every mirror. Cleaning the glass does not solve the ventilation or moisture conditions that make a bathroom repeatedly foggy.
Reference: Kohler’s mirrored-cabinet cleaning instructions. These illustrate why the cleaner, edges and surrounding materials matter; your mirror’s own instructions take priority.
9. Read the sofa’s cleaning code first
Use: the upholstery label before choosing any liquid. Remove loose debris using the permitted vacuum attachment. Blot a fresh spill gently with a clean white cloth rather than scrubbing it wider. If a cleaning product is needed, select one permitted by the code and manufacturer, test discreetly and avoid saturating the fabric.
Where it fits: the actual upholstery, not merely a sofa that looks similar in a video. Water-based, solvent-only and vacuum-only care are different. A cloth wrapped around a saucepan lid does not change what the fabric tolerates. Removable cushion covers are not automatically machine washable. Ask an upholstery professional when the label is missing or the stain persists.
Reference: Ashley Furniture’s cleaning-code explanations, which distinguish water-based and solvent care and restrict washing for certain covers.
10. Blot carpet spills before choosing a spot cleaner
Use: a clean white absorbent cloth and the carpet manufacturer’s spill instructions. Lift removable solids carefully, then blot liquid without grinding or scrubbing it into the pile. If the care guide calls for a spot cleaner, use the approved type and amount, test in an inconspicuous area and follow its residue-removal and drying instructions.
Where it fits: the identified carpet fibre, backing and stain treatment. Do not cover an unexplained odor with essential oil or assume that a kitchen powder is approved carpet care. A recurring damp smell warrants moisture investigation; heavily soaked carpet or an unknown contaminant needs suitable professional advice. A method for synthetic carpet may not suit a wool rug.
Reference: Shaw’s carpet-care instructions, which recommend approved cleaning products and warn about unsuitable household chemicals.
11. Remove bin residue rather than masking it
Use: the bin’s material-specific care instructions. Empty it and remove visible debris. Where permitted, wipe a stainless-steel exterior with a soft cloth, warm water and mild detergent, then remove residue and dry. Clean a removable liner or inner bucket according to its own instructions and let it dry before replacing the bag.
Where it fits: the identified bin, liner and finish. Sensor lids, hinges and batteries must not be soaked. Do not assume that a bleach treatment allowed for one removable bucket is suitable for its steel shell. A fragranced baking-soda mixture can leave the underlying spill untouched. If odor persists, check the lid, rim, underside and bag for residue or leakage.
Reference: simplehuman’s material-specific bin-care guidance, which gives different instructions for the steel exterior and removable bucket.
12. Remove water from shower glass after use
Use: a soft cloth or suitable shower squeegee, if permitted by the door manufacturer. From a secure standing position, remove water from accessible glass after showering and wipe accessible ledges dry. For routine washing, use only the approved cleaner, rinse as directed and remove the remaining water. Keep the floor clear and avoid reaching beyond a safe position.
Where it fits: intact shower doors with known coating requirements. Protective glass treatments can be damaged by abrasive pads or sharp tools. Avoid improvised scraping and universal vinegar recipes, particularly near stone, metal finishes or seals. Water removal helps limit deposits; it does not repair etched glass, failing seals or recurring mold. Use the bathroom moisture guide if growth returns.
Reference: STERLING’s bath and shower-door care guidance, including squeegeeing and the restrictions for treated glass.
Reference notes and a simple cleaning check
Before starting, note four things: the item and finish; the cleaner permitted by its label; the result of a hidden-area test; and how residue and moisture will be removed. Work on one small area before treating the whole surface. Keep the result separate from the expectation: “the stain lightened” is more useful than assuming the material has been restored.
The linked manufacturers explain care for their products; their examples are not approval for every brand or finish. CDC guidance supplies the distinction between routine cleaning and disinfection. These tips are researched general guidance, not reports of cleaning tests performed by MyHouseAnswers or independent reviews by the linked organisations. If a finish changes, damage appears or the same problem returns, stop and investigate rather than increasing the strength of the cleaner.